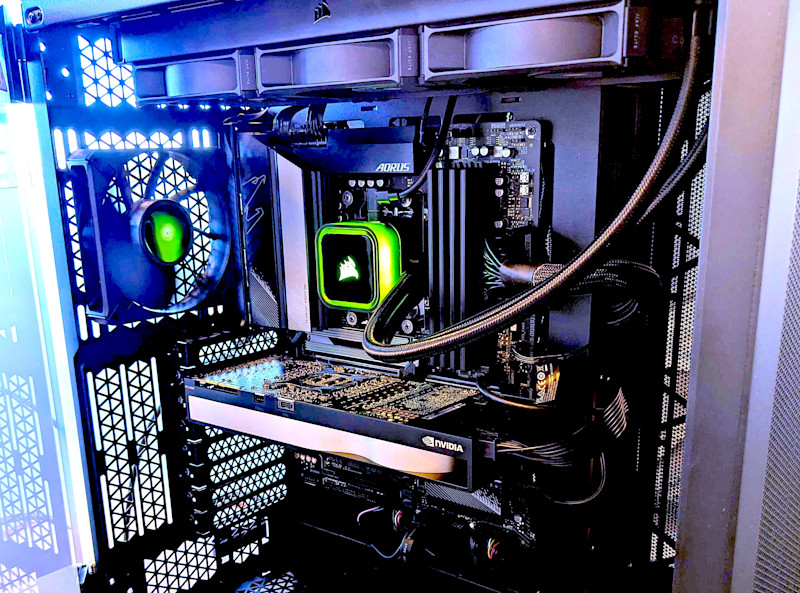
Why Did We Build a Gaming PC?
In the quest for high-performance computing at a reasonable cost, we decided to build a gaming PC. The rationale? Gaming PCs offer top-tier hardware, extensive customization, and the ability to maximize performance for far less money than a comparable prebuilt workstation. Plus, this "gaming PC" was built for AMT's manufacturing testbed, further justifying the investment. Read more in “Testbeds for Smarter Manufacturing.”
We've also lovingly dubbed our custom-built workstation PC the "Digital Twingine." It's a cheeky name hinting at how critical a powerful (and expensive) computer is for digital twin modeling and working in CAD, CAM, and the Nvidia Omniverse.
Another major reason for keeping costs under control? The AMT testbed operates on a limited annual budget of $10,000. Every dollar saved on hardware can be reallocated to software licenses, additional workstations, and other critical expenses.
The Build Breakdown
We put together a system with a total cost of $3,600. The key cost drivers were the CPU and GPU, meaning there was little reason to skimp on other components. You can check out the full parts list here: PCPartPicker Build.
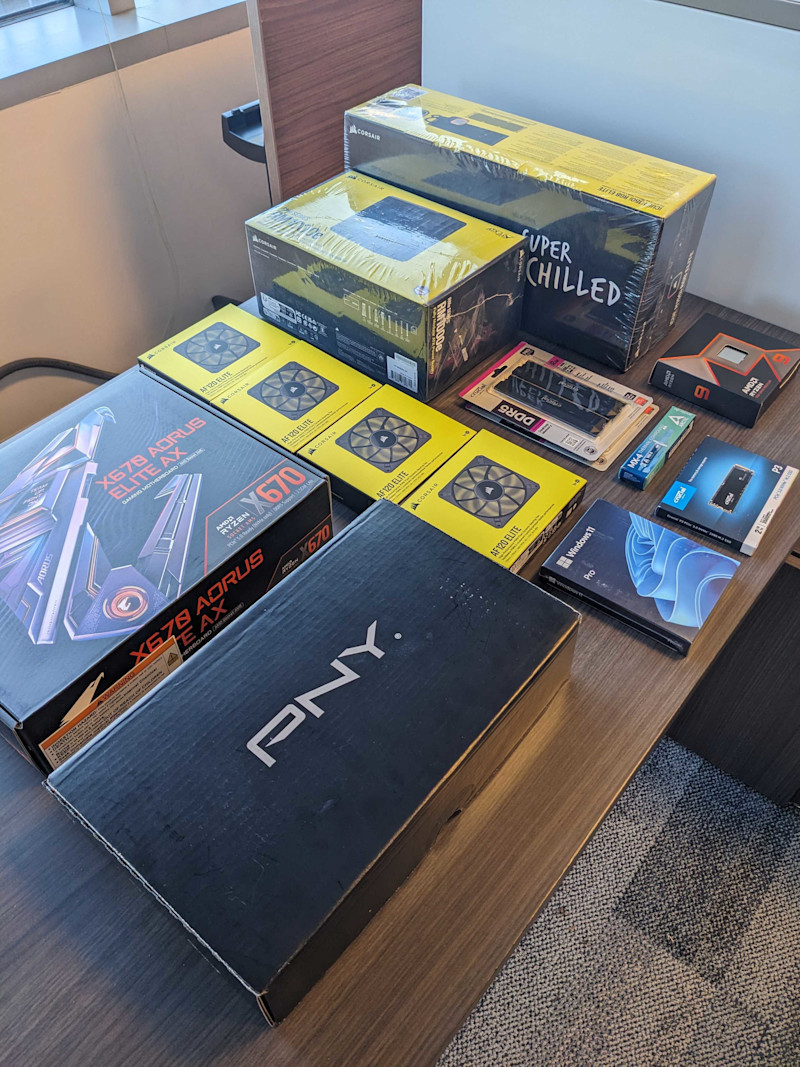
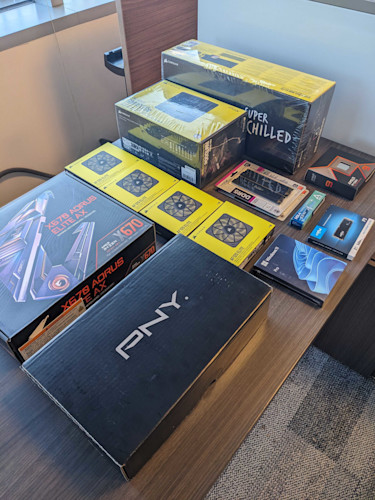
To put things into perspective, a comparable system from our PC supplier, Dell, would set us back about $9,000 – so this offered us a staggering $5,400 in savings. That’s a huge financial win, especially when those savings can be redirected toward software licenses and additional workstations.
A great video from a year ago covers some key takeaways on why building your own PC makes sense. Check it out: YouTube Video.
Maximizing Performance Without Overpaying
One of the biggest lessons in PC building is that you don’t need to buy from a major PC supplier to get top-tier performance. Big brands will overcharge you for lower-quality parts with similar specs, hiding the markup behind a warranty. Instead, sourcing the parts and building the PC yourself ensures you get the best components for your budget without paying a premium for branding and preassembly. The money saved can be reallocated to more important areas, like better cooling, software licenses, or additional workstations.
Another key point: Elite components are often only available in the aftermarket and not through a prebuilt PC manufacturer. If you want the best of the best, sourcing parts yourself is the only way to go.
Investing in the Right Motherboard
We learned this the hard way: Always invest in a good motherboard.
PCs are generational, so while pinching pennies on a mobo can result in a good motherboard, you may end up with one that ages quickly. With a top-tier mobo, you can upgrade the CPU and GPU as better ones come out, unlike lower-end units that can limit upgrade paths. A high-end motherboard will also utilize RAM speeds faster than what is currently available on the market; they are also thicker, incorporating more traces and increasing the bandwidth of various ports and slots. The best motherboard you can afford directly correlates to how future-proof your rig will be.
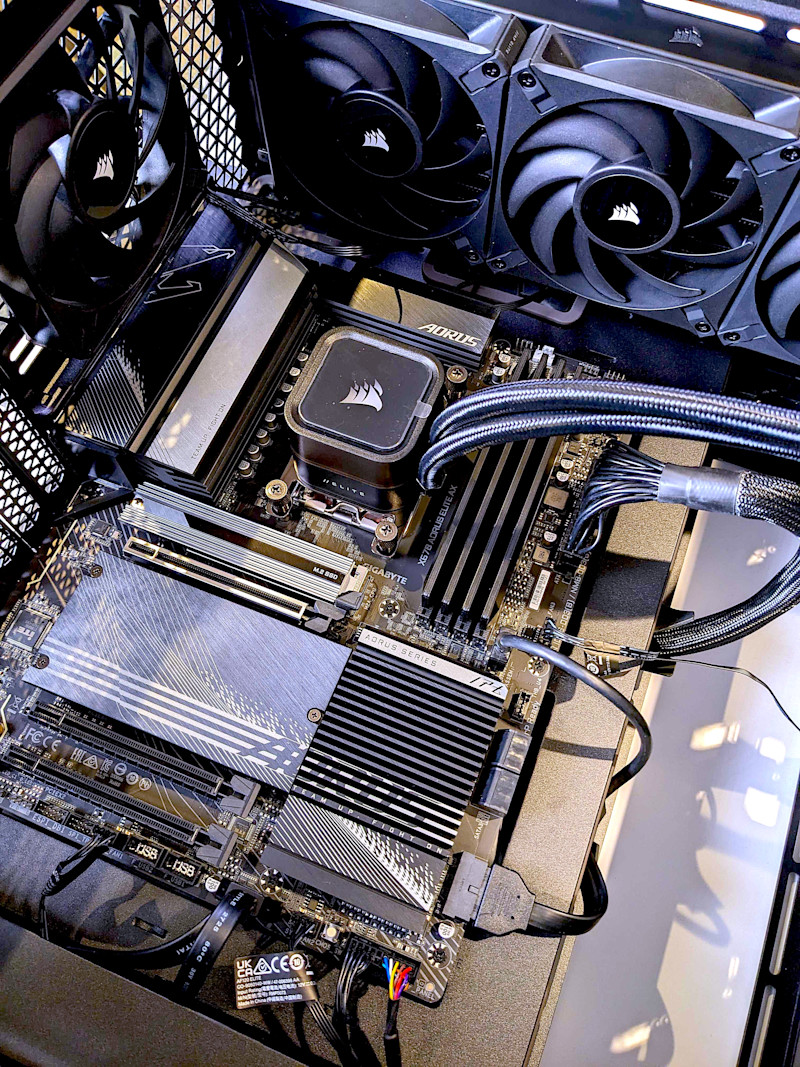
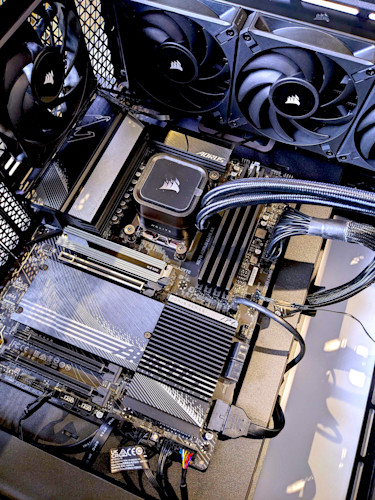
For this build, we selected a top-tier gaming-grade (ultra-premium consumer-grade) motherboard from the same manufacturer that builds custom industrial workstation motherboards for the Oak Ridge National Laboratory. This made it easy to justify spending extra – it’s a small investment compared to the CPU and GPU but makes a huge difference in performance and longevity.
Pro tip: Make sure your motherboard is made by Aorus – trust us on this one. Whether you’re visiting Autodesk’s West Coast tech center in San Francisco’s Pier 9 or Oak Ridge National Lab in Tennessee, the beefy rigs developing their generative design tools and harvesting crucial manufacturing data in real time are rocking Aorus mobos.
Data Storage
Models, simulations, scripts, and part programs are saved to:
Testbed laptop or workstation
Contributors' machines
AMT server
AMT SharePoint or OneDrive
Other cloud servers
We also used the following for storage:
Local storage for development and testing
Nvidia Nucleus for collaborative work and data management
Cloud Storage: Azure or other for scalability
Licenses/Software
Nvidia Omniverse: Standard license available for free
Omniverse Kit SDK: Development of custom applications and extensions
Omniverse Create: Scene composition and layout
Omniverse Isaac Sim: Robotics simulation
Omniverse Connectors: For connecting real-world sensor data to the digital twin
Hardware & System Requirements
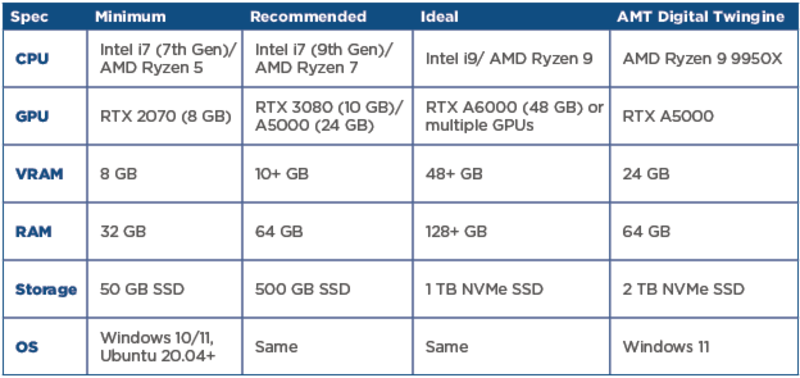
Omniverse and related tools are graphics-intensive. Below is a comparison of the required hardware specifications:
Personnel and Skill Requirements
3D Modeling: Software like Blender, Maya, etc.
Programming: Python for scripting, C++ for advanced development
OpenUSD: Understanding concepts and workflow
Robotics: Basic knowledge for accurate simulation
System Validation and Benchmarking
To measure and validate our build’s performance, we’re using Novabench 5 and GPU-Z, both free and effective benchmarking tools.
Optimizing the Motherboard
Initially, we noticed that the motherboard was throttling M.2 and GPU bandwidth. While this wasn’t a catastrophic issue, it was suboptimal – zero throttling is always preferable, especially when high-speed M.2 storage and GPU workloads are involved.
To resolve this, we moved the M.2 SSD to its own dedicated CPU trace, ensuring optimal bandwidth. The workstation booted up perfectly on the first attempt post-fix.
Benchmark Results
Novabench Score Pre-Fix: 7201
Novabench Score Post-Fix: 7294 (1.29% improvement – negligible but worth noting)
Final Performance and Results in Context
So, how did it all turn out? With a post-fix Novabench score of 7294, the Digital Twingine isn't just “good” – it’s punching well above its weight. That puts it squarely in the upper tier of high-performance workstations, easily rivaling, and in many cases outperforming, name-brand prebuilts that cost twice or even three times as much. More importantly, it meets and exceeds the demanding system requirements of tools like Omniverse Isaac Sim, meaning it’s fully equipped to handle cutting-edge digital twin modeling, real-time simulation, AI workloads, and collaborative design work without breaking a sweat. At roughly a third the cost of a comparable prebuilt machine, we’ve managed to build a professional-grade industrial workstation with elite components, excellent thermal and power efficiency, and the flexibility to grow with our needs.
The Takeaway
While each component plays a role, the whole is greater than the sum of its parts. Thoughtful component selection, proper optimization, and smart spending can deliver an incredibly powerful workstation at a fraction of the cost of a prebuilt system.
In short: build smart, source your parts, optimize thermals, and invest in a top-tier motherboard. The results speak for themselves.

